While the girls are sleeping, I wanted to get this post out.
I had a few requests for a tutorial on this style of bow. Since I
can't do korker bows right now I have found a new hair bow that I am enjoying. I call it my Gardenia bows. To me it looks like some Gardenia flowers I have seen. What is ironic is that I am allergic to Gardenias. I can still appreciate their beauty.
 |
| Favorite Gardenia Flower Bow, so far. |
 |
| 1st Attempt of a Gardenia flower hairbow. |
The first one I made I gave
as a gift attached to the bow holder I made as a birthday present. It was the favorite of several of the birthday guests as well as others who saw my post.
Now each time I make it I learn something new.
Materials:
- Ribbon (You can use almost any size)
- For the 2 outer bottom layers I used 5/8" ribbon.
- For the 2 top inner layers I used 3/8" ribbon.
- Circle for the center anchor piece (felt, foam, use your imagination)
- A peace symbol foamie from a bag I got on clearance at Michaels.
- Scissors
- Flame/Heat source to seal the end of the ribbons you cut (I use a lighter.)
- Glue (Using a hot glue gun works best for me.)
- Embelishment of choice for the center (A crystal like gem looks nice.)
- Preferred type of hair accessory to attach the bow. (I use a ribbon covered single prong metal hair clip.)
Step 1. Cut 8 ribbons for each layer. Start with the largest ribbon for the outer layer. I chose to start with 4 inches.
 |
| Cutting 4 inch length of 5/8" ribbon |
Step 2. Heat seal the ribbon on the ends to keep them from fraying.
Step 3. Take your first 4 inch ribbon, put a dab of glue on the top bottom piece of the ribbon, create a loop and glue just the bottom ends together. The loop is like those remembrance ribbons,
just don't leave any tail. Maybe if I say it is half of an infinity symbol? Not quite sure how to explain it.
I hope the pictures help.
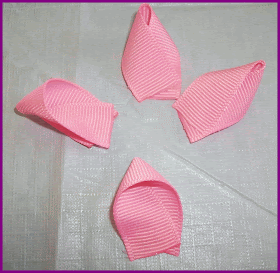 |
| The loop to glue. Looks like a cone with shorter ribbon. |
Step 4. Attach each loop at the end onto the top of the circle. Placing each loop across from the other making a cross pattern. Each set of 4 loops makes a square or cross. The first layer is 8 loops.
 |
| 1st cross pattern of 1st layer of ribbons. |
 |
| Finish 1st bottom layer of bow filling in the gaps. |
If you turn your creation upside down it looks like a flower too.
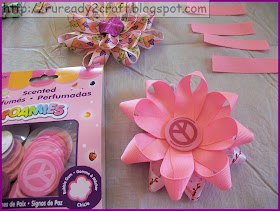 |
| Upside down, bottom view of the bow with loops attached to foam circle. |
Step 5. After your first set of 8 ribbon loops creating the bottom layer, repeat each layer using smaller ribbon loops. My 1st attempt, picture above, I only did 1 complete layer of 8 ribbons and only 4 ribbons on the top/last layer.
You can experiment with lengths and widths of the ribbon. With this purple/yellow Gardenia flower bow below, both layers are the same size length, 4". The purple ribbon is 7/8" ribbon.
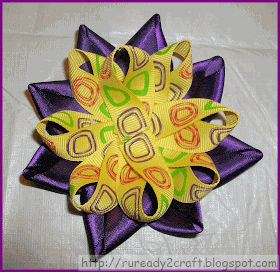 |
| 7/8" purple ribbon 4" long, 5/8" yellow ribbon 4" long. |
Step 6. I suggest your last layer be with 3/8" ribbon, it really looks good like the bow below.
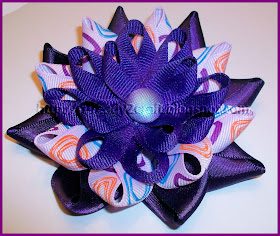 |
| Purple Gardenia Flower Hair Bow. |
If you stay with the 5/8" size you may not want to do as many layers. I wasn't thrilled with the outcome of the pink ribbon flower below. It is one I would like to change. I don't like the last layer of the 5/8" ribbon. The pink one was the 2nd one I had ever made, so I learned to use the 3/8" ribbon for the last layer like in the blue and purple ones above.
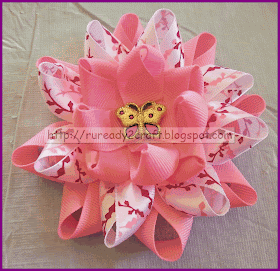 |
| Least favorite Gardenia flower craft bow. |
Step 7. Place chosen embelishment in center of flower. My daughters always pick the embellishments for the middles.
 |
| Almost looks like a crown for a princess! |
Step 8. Attach Gardenia flower to the hair accessory of your choice. I attached it to a single prong metal hair clip.
 |
| Handcrafted Blue Gardenia Flower Hair Bow. |
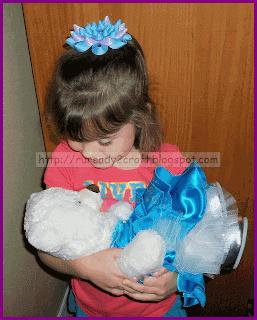
After wearing it a few times, it seems that others seem to think it looks like a crown on my daughters head. So maybe I should call it a Crown Flower Bow.
What do you think I should call it?
I am linking up to these craft parties!


