Glass Jar Turkey Decoration

Using the same glass jars we used for our pumpkins we created turkeys for Thanksgiving. We removed the orange and green paper, the black noses and mouths. We then created tail feathers using scrapbook paper. I solved the glue problem by using Beacon's 3 in 1 Advanced Craft Glue that I got at Michaels. The kids call it snot glue. It is thick, but gooey and stringy. It does stick to everything so far.
 
glass jar handcrafted into a Thanksgiving turkey
Thanksgiving Turkeys


http://ruready2craft.blogspot.com/2012/11/glass-jar-pumpkin-decorations.html
Before they become turkeys. They looked scared!
steps for a handcrafted thanksgiving turkey jar
Supplies, including the Snot Glue.
Using the scrap paper was Hey's idea. Personally I thought using the traditional red, yellow, and orange tail feathers would look great. The girls wanted them to look like real feathers and thought the patterns on the scrapbook paper was the best choice. Little did I know that meant lots of different paper. 
We used the orange and green paper from the pumpkins to guide the size of the brown paper for inside the jars.
Using the paper from the Pumpkin to size the paper for the inside of the Turkey Jar. 
creating template for turkey feathers
The tracing of feathers from the template to be cut out. 
I took a chance and did one feather template free hand. I must have done 10 of them before we came up with a general consensus on the one we liked. We then used it to trace others onto the scrap paper. I think the feathers came out okay.
creating feathers for thanksgiving turkey jar
Tracing the hard way.
I had to tell Hey it was easier to trace it on the white side of the paper. Myrrh wanted all peacock feathers despite my discouragement. It doesn't look like a turkey to me. It looks like a peacock! Oh well, it is one of my areas of growth. Letting go and allowing my children to direct what they see as art. They are cute no matter what they may or may not look like.
Using the snot glue to attach the feathers to the jar.
I will claim credit for the yellow foam feet since that was my idea. The top hat and red scarf were again Hey's idea. She thinks that makes it a decorative turkey.
The top hat was a challenge. Hey stapled the circle of the hat. Then she taped the top from the inside. It doesn't look good from the inside, but it works all the same from the outside.
Taping the top of the hat.
Finished hat. See you barely can see the mess.
The beaks and red gobble neck on one of the turkeys were cut from vinyl type shape stickers that we had.
http://ruready2craft.blogspot.com/2012/12/glass-jar-turkey-decoration.html
Completed set of Thanksgiving Turkey Jars.
turkey decoration for thanksgiving
Turkey with a gobble.
The snot glue was very helpful this time keeping the tail feathers attached to the jar and the red scarf. Just think if we had discovered how good the snot glue was to begin with, we may never have gotten the pumpkin jars that we are able to transition for every holiday. Wait until you see the Christmas jars! 
Until then, happy crafting.
I am linking up to these craft parties!

Glass Jar Pumpkin Decorations

This is truly a kid created craft. My girls wanted to turn some empty jars we had into pumpkins. They wanted to paint the glass jars orange and the lids brown or green. We didn't have any paint that would stay on glass. Myrrh and Hey started to brainstorm ideas. They decided they wanted to glue or tape paper to the outside of the jar. There was a suggestion that they cut jack o'lantern patterns in the paper then use a candle on the inside to illuminate it. I thought that sounded cool, jack o'lanterns with tea lights inside the glass.
glass jar pumpkin decorations
Glass Jar Jack O'Lanterns

Then the paper didn't want to stay on the jars with glue. I don't know how it all happened, but the paper ended up on the inside. When I told them they couldn't put candles on the inside with the paper they decided they would put faces on the outside of the jar. Stickers worked where the glue had failed. I haven't seen anyone else use paper inside of a jar as a decoration. It isn't the best looking thing, but creative. My little artists never cease to amaze me.
Supplies:
Glass Jars without labels
Colored construction or cardstock paper
Ruler
Scissors
Stapler
Foam Stickers
Googly Eye stickers
1. Soak the jars in warm soapy water to remove the labels.
preparing glass jars for decoration
Soaking labels off bottles
2. Dry the jars out. 
preparing glass jars for a craft
Myrrh drying out the inside of the jars.
 3. Cut the paper to the proper size to fit the size of the jar. They used a Cricut paper cutter to get a straight edge.
glass jar pumpkin craft
Cutting paper down to size.
4. Roll the paper to fit into the jar. Measure the height of the jar to determine how short the paper roll needs to be inside the jar.
paper craft for a pumpkin jar
Measuring the jar to cut the paper to the right size.
 5. Cut the paper to the proper size to fit as close to the inside wall of the jar as possible.  
orange craft paper cut to size for pumpkin glass jar
The orange paper cut to fit the bottom section of the jar.

6. For the top piece, green stem of the pumpkin, you will need to measure and cut again. Roll it to the proper size. Staple it into a roll so it stays uniform in size.
Added the green paper for the pumpkin stem.

7. Choose your decorations for the outside. My girls decided to use foam stickers to create the nose and mouth.
 
Foam stickers that got slaughtered for the girls idea of a face.
 
8. They decided the $1 store stickers were to big for the jars, so they cut out their own faces. 
 
craft paper used in a glass jar for pumpkins
Glass jars decorated as pumpkins. 
 
They don't look like jack o'lanterns to me (more like ghosts), but the girls loved them just the same. They were very proud of their creation and displayed them in our front window for all the neighbors to see.
Sure they could have filled them with candy corn, or some other clever thing, but these are their unique creations. The beauty of them being paper and stickers is that we can recycle the jars for the next project. I have plans for the next holiday for these, just wait and see.
 
I am linking up to these craft parties!

Chef or Artist Beret or Genie Costume Hats for Fun!

This project originated from Myrrh's teacher.  A really cute chef hat. They played a math game at school called, Order Up. It sounded fun. Her favorite part was the hat of course. The band was made of only 1 piece of paper, probably poster board. We only had regular 8 1/2 X 11 card stock paper. Have you ever wondered why that is the standard size? I didn't want to have that much stapled paper around their heads. Plus, there would be to many seams. 

baker chef genie hat costume
Order Up Hat from School
Since I didn't have a strip of paper long enough to go around the circumference of the girls' heads we had to improvise. Hey suggested we use ribbon. It was actually an interesting idea, but I don't have ribbon that wide or did I? I remember we had some Christmas ribbon that we used for making bows on presents. I figured it wouldn't hurt to try it. The girls thought it was awesome since it sparkled.

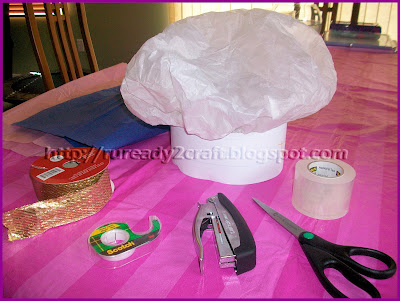
You use gift wrap tissue paper for the top puffy part of the hat. We had white, but the girls decided they wanted colored paper.


diy tissue paper check baker hat
Supplies along with the sample to follow.

We started by measuring out the length of ribbon needed for the band of the hat.

craft ribbon head band part of chef baker hat
Head band of hat.
Next you take the tissue paper and tape two of the corners to the inside of the band. Tape one corner and then the other on the opposite side of the headband. Then you gather or wrinkle up little sections and tape them to the inside of the hat band. We tried to use Scotch tape. As I suspected would happen, it didn't stick well. We switched to packing tape. It is the kind you don't have to use with scissors.

Attach tissue paper to inside of head band

Hey in her beret artist hat.

diy french beret artist costume hat
Chef/Baker hat flattened makes a cool artist beret.
  
chef baker hat dress up costume
With the hat, it is a complete chef/baker costume.
The girls really enjoyed making something they could wear. You could see the pride in their eyes. It would be nice if they would decide what they are actually going to wear for costumes. They seem to change their minds on a daily basis.
 
I am linking up to these craft parties!

Beautiful Butterfly Hair Clip Accessories

I have had a great time finding easy ways to make unique hair accessories. I not only found the crochet flowers, I also found these butterfly appliques. I am loving eBay for super easy ways to create beautiful and adorable hair clips. You can find these great appliques to use by looking on eBay for sewing craft items. The particular store I have ordered the crochet flowers and now these butterflys, carries tons of cute appliques. There are ladybugs, flowers, crowns, hearts, dogs, teddy bears, and many more. I could have spent a fortune.   I got 50 padded sparkling 2 layer butterfly appliques. It cost me about 16 cents per butterfly including the cost of shipping.
 
 
Supplies:
Hair clip of choice covered with grosgrain ribbon of choice
Butterfly appliques
Glue
 
 
Start with the foundation of a nice color coordinating covered hair clip.

Sparkling butterfly applique hair accessory
Bag of 2 layer sparkling butterfly applique to attach to hair clip.
Sparkling butterfly applique hair accessory
Padded 2 layer sparkling butterfly applique to attach to hair clip.
Place some glue on the back of the butterfly, the felt side, and press it onto a hair clip. Voila, an adorable butterfly hair clip. The one tip I will offer is that on the alligator style clips that I use you have to think about placement. If you want a set or pair to be used together, say on pig tails, you want one to face one way and the other in a different direction. Otherwise you end up with one upside down butterfly when you place it in the hair. Does that make sense?


I make them so that when I slide them into each side of the hair, the butterfly is right side up. Most of my hair clips don't have a right side. They are usually able to be used either way. Be sure to test it and see which side up you want it.

These provide some more great choices to coordinate with a little girls wardrobe. With the volume of clips my girls now have, I am going to look at some different display and storage options.
 
 
I am linking up to these craft parties!

Crochet Flower Hair Clip Bows

It isn't easy being original when creating hair accessories. I was proud of my Gardenia and Luau Flower Bows, but it seemed the end of my originality. I wanted more beauties, but not have to spend to much money or drive myself crazy trying to be original. After a good tip from a friend, I have discovered you can buy almost anything you want on eBay. I found what I needed to feed my desire for my beautiful hair accessories.

Under sewing crafts on eBay I found a nice source for my hair accessories. I ordered some items and didn't wait long. They arrived quickly. Let the fun begin. I started with the Handmade Crochet Flower Appliques. I had gotten two different kinds. The solid 2 layer crochet flower appliques that are approximately 1 1/4 inch in size (costs 18 cents each) and the two tone that are about 1 1/2 inch large (38 cents each). The costs included what I spent for shipping. Shop around, you may find a better deal, especially if you are willing to wait longer for shipping.

DIY embellished Crochet Hair Clip
Embellished 2 Layer Crochet Flower Hair Clips
Materials:
Handmade Crochet Flower Appliques
Hair Clip lined with some 3/8 inch grosgrain ribbon
Hot Glue
Embellishment of choice
embellished crochet applique on lined hair clips craft
Crochet appliques to apply to lined clips
Attach a crochet flower applique to a complementary covered and lined hair clip. I used hot glue. I use lots of hot glue. I end up cleaning up strings and clumps for days and again when I go to place it in my daughters hair. I have never had one fall apart from a lack of glue! You can leave it plain or attach your favorite embellishment to the center.

DIY embellished 2 layer purple crochet applique on lined hair clip
2 layer crochet attached to lined hair clips with embellishment of my choice

crochet flower hair bow craft with bling
Completed project. Embellished crochet flower hair bows.
Voila! You now have your own creation.

two layer two tone crochet flower on lined hair clip
2 tone 2 layer crochet applique. Left the purple ones plain.
I am quite pleased with myself. I was able to make some really cute colorful hair accessories for less than I would pay if I bought the completed clips on Etsy or eBay.

DIY embellished two tone two layer crochet flower hair bow
Two tone, two layer crochet flower with my added bling.
You can make these to coordinate with any wardrobe. It is so great to have so many choices for hair accessories. I don't think there is an outfit that doesn't match at least one of the bows I have made! For the price of what one set of hair bows would normally cost me, my daughters have 5-10 to choose instead. Wait until you see what else I found and made!

I am linking up to these craft parties!

Dollar Store Craft - Luau Flower Hair Bow

A dollar store can be a great place to get inspiration and find supplies. My girls always notice when the Luau party items are in season. They are not allowed to wear jewelry at school so I think they want fancy hair accessories instead.  Myrrh has been requesting more flowers. I picked up some luau flower necklaces at the dollar store and created some great hair bows. What I like about them is that not only are they inexpensive, but an easy craft too. When looking at the finished product, I feel it was rewarding to make them. It is a fashion that will get you noticed.

easy flower hair bow craft hair accessory
Handmade Luau Flower Bow
Supplies:

Luau/Lei of flowers                                  $ 1.00
Foam or felt circle for back piece           < $  .25
Hair clip of choice                                  < $   .40
Embellishment of choice for the center  < $1.00
Scissors
Glue (hot glue gun)

luau flower hair bow craft
Luau Flowers from Dollar Tree.
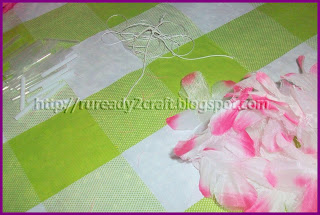
Step 1. Cut the string of the Lei necklace. Take the flower petals off the string.

luau flower petals for hair bow craft
Lei cut apart and flower petals separated.
Step 2. Use your center piece of material to attach the flower petals to. I use foamies I got on clearance. I have found them very useful.

luau flower hair bow craft
Foam center used to attach flower petals.
Step 3. Attach (I use a hot glue gun) one petal at a time layering them one on top of the other. When you layer them try to keep them centered, but alternate the petals for a fuller look. Be careful if you are using a hot glue gun. The flower material is incredibly flimsy and porous. The glue goes through easily. I used the end of a wooden dowel to press the petal down on top of the center while the glue was hot.
luau flower petal dollar store hair bow craft
Layers of luau flower petals with glue in the center.
Bottom view of luau flower petals attached to center piece.
Step 4.  Once you have done enough layers to achieve the look you want, attach your choice of embellishment to the center.
luau flower petals with embellishment for hair bow craft
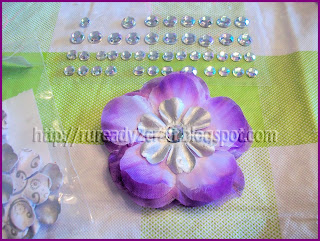
Butterfly embellishment in the center of luau flowers.
luau flower petals with embellishment for hair bow craft
Different ideas for center embellishments.
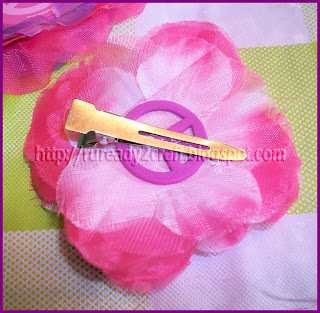
Step 5. Attach your choice of hair clip to the back of the center piece.

luau flower petals attached to hair clip
Luau flower attached to hair clip for a beautiful bow.
These are so easy to make that I can do several at one session of sitting doing crafts. I can make 6 of these in the same time it takes me to make one Gardenia Flower Hair Bow.

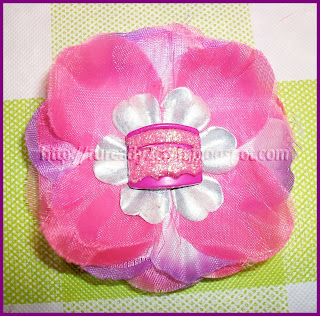
Shades of pink flower center in luau flower petal hair bow
Shades of pink flower center in luau flower petal hair bow.

Purple Butterfly Luau Flower Hair Bow
Purple butterfly luau flower hair bow
I let the girls pick out the center embellishments they want. These bows will be a great addition to their collection of hair accessories. Their wardrobes have plentiful supplies of purple and pink outfits. 

Pink cake Luau Flower Hair Bow
Pink cake luau flower hair bow
Dollar store luau flower petal hair clip bows
I made these all in one craft session.

Handmade beautiful luau flower petal hair bows
Handmade beautiful luau flower petal hair bows.
These look fabulous in the hair. I think the next time I am in the dollar store I will pick up some different colors of the luau flower necklaces.

I have posted in these crafty parties and Making the World Cuter.