Showing posts with label bows. Show all posts

Beautiful Butterfly Hair Clip Accessories

I have had a great time finding easy ways to make unique hair accessories. I not only found the crochet flowers, I also found these butterfly appliques. I am loving eBay for super easy ways to create beautiful and adorable hair clips. You can find these great appliques to use by looking on eBay for sewing craft items. The particular store I have ordered the crochet flowers and now these butterflys, carries tons of cute appliques. There are ladybugs, flowers, crowns, hearts, dogs, teddy bears, and many more. I could have spent a fortune.   I got 50 padded sparkling 2 layer butterfly appliques. It cost me about 16 cents per butterfly including the cost of shipping.
 
 
Supplies:
Hair clip of choice covered with grosgrain ribbon of choice
Butterfly appliques
Glue
 
 
Start with the foundation of a nice color coordinating covered hair clip.

Sparkling butterfly applique hair accessory
Bag of 2 layer sparkling butterfly applique to attach to hair clip.
Sparkling butterfly applique hair accessory
Padded 2 layer sparkling butterfly applique to attach to hair clip.
Place some glue on the back of the butterfly, the felt side, and press it onto a hair clip. Voila, an adorable butterfly hair clip. The one tip I will offer is that on the alligator style clips that I use you have to think about placement. If you want a set or pair to be used together, say on pig tails, you want one to face one way and the other in a different direction. Otherwise you end up with one upside down butterfly when you place it in the hair. Does that make sense?


I make them so that when I slide them into each side of the hair, the butterfly is right side up. Most of my hair clips don't have a right side. They are usually able to be used either way. Be sure to test it and see which side up you want it.

These provide some more great choices to coordinate with a little girls wardrobe. With the volume of clips my girls now have, I am going to look at some different display and storage options.
 
 
I am linking up to these craft parties!

Crochet Flower Hair Clip Bows

It isn't easy being original when creating hair accessories. I was proud of my Gardenia and Luau Flower Bows, but it seemed the end of my originality. I wanted more beauties, but not have to spend to much money or drive myself crazy trying to be original. After a good tip from a friend, I have discovered you can buy almost anything you want on eBay. I found what I needed to feed my desire for my beautiful hair accessories.

Under sewing crafts on eBay I found a nice source for my hair accessories. I ordered some items and didn't wait long. They arrived quickly. Let the fun begin. I started with the Handmade Crochet Flower Appliques. I had gotten two different kinds. The solid 2 layer crochet flower appliques that are approximately 1 1/4 inch in size (costs 18 cents each) and the two tone that are about 1 1/2 inch large (38 cents each). The costs included what I spent for shipping. Shop around, you may find a better deal, especially if you are willing to wait longer for shipping.

DIY embellished Crochet Hair Clip
Embellished 2 Layer Crochet Flower Hair Clips
Materials:
Handmade Crochet Flower Appliques
Hair Clip lined with some 3/8 inch grosgrain ribbon
Hot Glue
Embellishment of choice
embellished crochet applique on lined hair clips craft
Crochet appliques to apply to lined clips
Attach a crochet flower applique to a complementary covered and lined hair clip. I used hot glue. I use lots of hot glue. I end up cleaning up strings and clumps for days and again when I go to place it in my daughters hair. I have never had one fall apart from a lack of glue! You can leave it plain or attach your favorite embellishment to the center.

DIY embellished 2 layer purple crochet applique on lined hair clip
2 layer crochet attached to lined hair clips with embellishment of my choice

crochet flower hair bow craft with bling
Completed project. Embellished crochet flower hair bows.
Voila! You now have your own creation.

two layer two tone crochet flower on lined hair clip
2 tone 2 layer crochet applique. Left the purple ones plain.
I am quite pleased with myself. I was able to make some really cute colorful hair accessories for less than I would pay if I bought the completed clips on Etsy or eBay.

DIY embellished two tone two layer crochet flower hair bow
Two tone, two layer crochet flower with my added bling.
You can make these to coordinate with any wardrobe. It is so great to have so many choices for hair accessories. I don't think there is an outfit that doesn't match at least one of the bows I have made! For the price of what one set of hair bows would normally cost me, my daughters have 5-10 to choose instead. Wait until you see what else I found and made!

I am linking up to these craft parties!

Dollar Store Craft - Luau Flower Hair Bow

A dollar store can be a great place to get inspiration and find supplies. My girls always notice when the Luau party items are in season. They are not allowed to wear jewelry at school so I think they want fancy hair accessories instead.  Myrrh has been requesting more flowers. I picked up some luau flower necklaces at the dollar store and created some great hair bows. What I like about them is that not only are they inexpensive, but an easy craft too. When looking at the finished product, I feel it was rewarding to make them. It is a fashion that will get you noticed.

easy flower hair bow craft hair accessory
Handmade Luau Flower Bow
Supplies:

Luau/Lei of flowers                                  $ 1.00
Foam or felt circle for back piece           < $  .25
Hair clip of choice                                  < $   .40
Embellishment of choice for the center  < $1.00
Scissors
Glue (hot glue gun)

luau flower hair bow craft
Luau Flowers from Dollar Tree.
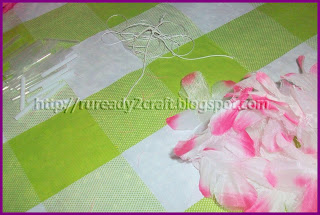
Step 1. Cut the string of the Lei necklace. Take the flower petals off the string.

luau flower petals for hair bow craft
Lei cut apart and flower petals separated.
Step 2. Use your center piece of material to attach the flower petals to. I use foamies I got on clearance. I have found them very useful.

luau flower hair bow craft
Foam center used to attach flower petals.
Step 3. Attach (I use a hot glue gun) one petal at a time layering them one on top of the other. When you layer them try to keep them centered, but alternate the petals for a fuller look. Be careful if you are using a hot glue gun. The flower material is incredibly flimsy and porous. The glue goes through easily. I used the end of a wooden dowel to press the petal down on top of the center while the glue was hot.
luau flower petal dollar store hair bow craft
Layers of luau flower petals with glue in the center.
Bottom view of luau flower petals attached to center piece.
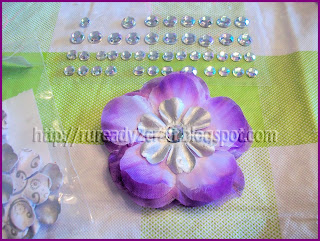
Step 4.  Once you have done enough layers to achieve the look you want, attach your choice of embellishment to the center.
luau flower petals with embellishment for hair bow craft
Butterfly embellishment in the center of luau flowers.
luau flower petals with embellishment for hair bow craft
Different ideas for center embellishments.
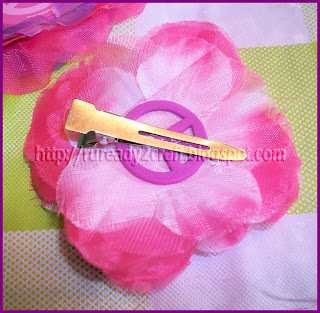
Step 5. Attach your choice of hair clip to the back of the center piece.

luau flower petals attached to hair clip
Luau flower attached to hair clip for a beautiful bow.
These are so easy to make that I can do several at one session of sitting doing crafts. I can make 6 of these in the same time it takes me to make one Gardenia Flower Hair Bow.

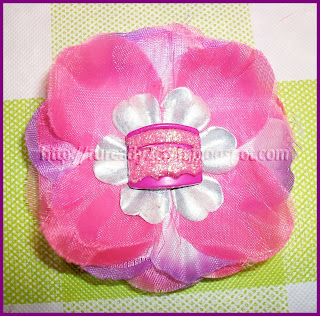
Shades of pink flower center in luau flower petal hair bow
Shades of pink flower center in luau flower petal hair bow.

Purple Butterfly Luau Flower Hair Bow
Purple butterfly luau flower hair bow
I let the girls pick out the center embellishments they want. These bows will be a great addition to their collection of hair accessories. Their wardrobes have plentiful supplies of purple and pink outfits. 

Pink cake Luau Flower Hair Bow
Pink cake luau flower hair bow
Dollar store luau flower petal hair clip bows
I made these all in one craft session.

Handmade beautiful luau flower petal hair bows
Handmade beautiful luau flower petal hair bows.
These look fabulous in the hair. I think the next time I am in the dollar store I will pick up some different colors of the luau flower necklaces.

I have posted in these crafty parties and Making the World Cuter.

Gardenia Flower Hair Bow Craft

While the girls are sleeping, I wanted to get this post out.
I had a few requests for a tutorial on this style of bow. Since I can't do korker bows right now I have found a new hair bow that I am enjoying. I call it my Gardenia bows. To me it looks like some Gardenia flowers I have seen. What is ironic is that I am allergic to Gardenias. I can still appreciate their beauty.
Gardenia Crown Flower Bow Craft for the hair
Favorite Gardenia Flower Bow, so far.

Flower Hair Bow Craft
1st Attempt of a Gardenia flower hairbow.
The first one I made I gave as a gift attached to the bow holder I made as a birthday present. It was the favorite of several of the birthday guests as well as others who saw my post.  Now each time I make it I learn something new.

Materials:
  • Ribbon (You can use almost any size)
    • For the 2 outer bottom layers I used 5/8" ribbon.
    • For the 2 top inner layers I used 3/8" ribbon.
  • Circle for the center anchor piece (felt, foam, use your imagination)
    • A peace symbol foamie from a bag I got on clearance at Michaels.
  • Scissors
  • Flame/Heat source to seal the end of the ribbons you cut (I use a lighter.)
  • Glue (Using a hot glue gun works best for me.)
  • Embelishment of choice for the center (A crystal like gem looks nice.)
  • Preferred type of hair accessory to attach the bow. (I use a ribbon covered single prong metal hair clip.)
Step 1. Cut 8 ribbons for each layer. Start with the largest ribbon for the outer layer. I chose to start with 4 inches.
cutting ribbon for creating hair bow
Cutting 4 inch length of 5/8" ribbon
Step 2. Heat seal the ribbon on the ends to keep them from fraying.

Step 3. Take your first 4 inch ribbon, put a dab of glue on the top bottom piece of the ribbon, create a loop and glue just the bottom ends together. The loop is like those remembrance ribbons, just don't leave any tail. Maybe if I say it is half of an infinity symbol? Not quite sure how to explain it. I hope the pictures help.
ribbon for flower bow
The loop to glue. Looks like a cone with shorter ribbon.
Step 4. Attach each loop at the end onto the top of the circle. Placing each loop across from the other making a cross pattern. Each set of 4 loops makes a square or cross. The first layer is 8 loops.

ribbon loops for layer of flower bow
1st cross pattern of 1st layer of ribbons.

Finish 1st bottom layer of bow filling in the gaps.
If you turn your creation upside down it looks like a flower too.

foam circle used at center of ribbon loops
Upside down, bottom view of the bow with loops attached to foam circle.
Step 5. After your first set of 8 ribbon loops creating the bottom layer, repeat each layer using smaller ribbon loops. My 1st attempt, picture above, I only did 1 complete layer of 8 ribbons and only 4 ribbons on the top/last layer.

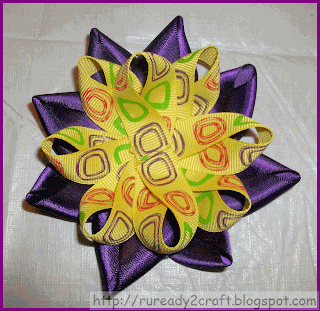
You can experiment with lengths and widths of the ribbon. With this purple/yellow Gardenia flower bow below, both layers are the same size length, 4". The purple ribbon is 7/8" ribbon.

layers of looped ribbon for flower bow craft
7/8" purple ribbon 4" long, 5/8" yellow ribbon 4" long.
Step 6. I suggest your last layer be with 3/8" ribbon, it really looks good like the bow below.
Purple Gardenia Flower Hair Bow handmade
Purple Gardenia Flower Hair Bow.
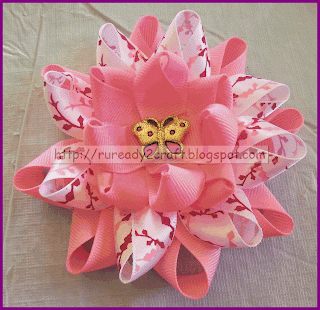
If you stay with the 5/8" size you may not want to do as many layers. I wasn't thrilled with the outcome of the pink ribbon flower below. It is one I would like to change. I don't like the last layer of the 5/8" ribbon. The pink one was the 2nd one I had ever made, so I learned to use the 3/8" ribbon for the last layer like in the blue and purple ones above.
Gardenia flower bow craft
Least favorite Gardenia flower craft bow.
Step 7. Place chosen embelishment in center of flower. My daughters always pick the embellishments for the middles.
homemade Gardenia flower hair accessory
Almost looks like a crown for a princess!
Step 8. Attach Gardenia flower to the hair accessory of your choice. I attached it to a single prong metal hair clip.
Blue Gardenia Flower Crown Hair Bow craft
Handcrafted Blue Gardenia Flower Hair Bow.
After wearing it a few times, it seems that others seem to think it looks like a crown on my daughters head. So maybe I should call it a Crown Flower Bow. What do you think I should call it?

I am linking up to these craft parties!


How NOT to make Korker Bows - Craft Fail

It is getting to be quite a sizzling summer. Yesterday was 105 degrees. Since NASA is still unemployed we have to try everyway we can to cut back. That means a much warmer house with less use of the A/C.  With a 2 story house on just 1 unit it is tough. It just means using the oven as little as possible to help keep the house cooler. Well, you have to use the oven to make good korker bows. So I was thinking.... think, think, think. Then, Pooh, I had an idea.

korker bow craft
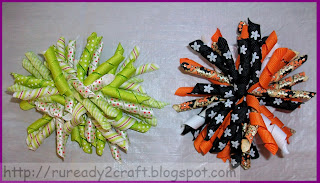
My favorite korker bow creations before summer hit.
It is hot here. To make korker bows you need heat. Normally I put the ribbons in the oven for 20 minutes at 275 degrees. It may not be necessary to keep the oven that hot for that long.  So I wondered if I took the ribbons out into the hot sun would that 'bake' them enough?
Out in the sun all day to make korker bows.
So I wrapped my ribbon around my favorite korker ribbon makers, BBQ skewers. Then what everyone else uses, 1/4" wooden dowels. Wet them thoroughly to set on my old cookie sheet outside. I placed them outside in the part of our yard that gets sun 16 hours of the day. I put them on a teak end table thinking heat rises up from the walkway. I let them 'cook' there all day.
After a day in the sun, they were super dry, but were they curly?
I brought them inside out of the desert heat and sun at 8 PM. I chose two specimens to test. I felt like a hairdresser checking to see if a perm is done. Anywho, the results were less than I wanted, but still made them curly. They just weren't curly enough for my korker bows. Bummer.
The results are a little to loose for me.
Huge craft fail. I guess I will stick with my other bow making until it is cool enough to turn the oven on or if I feel like staying up past 1 AM or get up before 5 AM. I don't see that happening anytime soon. I am not that dedicated or driven for korker bows.

Right now I am into what I call my Gardenia bows. Look for that post soon.

In The Beginning

My husband and a good friend, Amanda, helped create my blog title. He suggested Passive Crafter, Disaster Crafter and decided that The Bow Master was the one, but I do more than bows. I also wouldn’t call me a ‘Master’ of any craft. Amanda, who I consider a Master Crafter, is the one who helped me go with the current title.


My first e-mail address back in 1993 was ruready1st. My account on Twitter is ruready1st and I have used it on several message boards and forums. I guess that is the best way to explain why this blog is RUReady2Craft.


In the beginning, I accidentally started doing crafts. I actually have another blog for me to be me, An Obsessed Analyst. My first posts came directly from that site. I started this blog to let me focus on my latest obsession, crafts. I may just have to break down and admit I can craft. I may have some latent artistic talent?


I am the mother of two beautiful little girls who deserve the best. They have artistic inclinations. What I see as a mess, they see as creating art. Both girls are strong visual spatial learners. While homeschooling them as a kindergartner and pre-schooler I discovered that arts and crafts were their favorite subject. It was the one activity that they would choose over television and video games.

Now the issue is that I do not really consider myself artistic. I love to shop, talk, spend money, read, research things on the internet, and did I mention shop.


When I moved to Tucson, Arizona I was introduced to the craft of making jewelry with beads. Tucson has the best supply of inexpensive high quality beads during the Tucson Gem, Mineral and Fossil Show. I made my own necklaces and bracelets. I actually quit doing it when we had our first child. I was petrified that I would misplace a bead and she would choke. I gave all my beads away to a family member.


Some necklaces I made over 7 years ago. Left: faux freshwater pearls, Middle: natural Rubies & Swarovski Crystal, and glass beads necklaces.
I never saw the jewelry I made as being into crafts. I thought of it more of an economical choice since I adore jewelry that coordinates with my wardrobe. It was more cost effective to make my own to feed my need. I didn't think my creations were very unique either, just creations that matched my outfits. When I quit I actually had a huge supply of choices and didn't really need anymore. I had run out of jewelry box space.


Then we had two little girls. At first our crafts were fairly simple without much imagination required. There were Moms in Tucson that were incredibly clever making their children clothes, hats, and bows. I admired their talent, but it didn't seem realistic for me to do.


Then I met some Moms in Las Vegas. They were crafters. They had stamps, Cricuts, beads, hand print art, handmade jewelry (not beaded) and projects that were so creative. I saw the fruits of their labor, much of it they did with their children as a part of their homeschool experience. I felt inspired and started doing little things too. I never imagined my girls favorite thing to hear someone say is, "Are you ready to craft?" The real kicker was when my babysitter started doing crafts with the kids with all the supplies I would leave out. When I would ask her where she got the idea, she would say she looked it up on the internet.


The revelation that I could copy other people’s genius from the internet was born. I let the craft monster loose in the house. First the Cricut, then the lunch bag animals, and then bows. Right now I am stuck on bows. I hope to add jewelry too. I may just turn into a master crafter!

Surprise! Another Day of Bows

My oldest daughter has been invited to a birthday party of one of her classmates. We don't really have the resources to buy a present that I would feel comfortable giving. I am trying something new. I have until May 19th to see if I can pull it off to my satisfaction. I decided to follow directions and make some corker bows. I didn't realize how time consuming it could be. First I used dowels that were to large so the spirals were to loose. So I used skewers from our grill tools to get a tighter spiral. They worked great, but I only had four of them.
The mail arrived while I was lamenting about my lack of choices. My Mom, Grandma, comes through. She sends us boxes of clothes or supplies I request on a fairly regular basis. She rocks. She sent me 1/4 inch dowels that were perfect. I was able to make more that had the right spiral tightness.

I made some different combinations of the 3/8 inch grosgrain ribbon. It takes 25 minutes in the oven for the wet ribbon to get the twist. Add on twisting it onto the dowel and taking it off then the time to heat seal the ends it is quite the project. I wish I knew some shortcuts. The end results are fairly nice. I spent 6 hours making 6 bows and 2 hair clips. I would like a better return on my time. I can see why bows like this cost $8-10. If I ever see any for less than $8, then I know they are a real steal since they are so labor intensive.
I do have two favorites that I will have to make again since I will want my daughters to get a chance to wear them. I also think I will look in their closet to see what I can specifically coordinate with a dress or outfit.

Now I have to figure out what to do with all the 5/8 inch ribbon. I will have to watch more You Tube videos. Feel free to make suggestions.